Atom Instruments is a leading provider of Metallurgical Image Analyzer services in Mumbai, offering top-quality software at the best prices. Our CAST Analysis Software is highly valued by customers for its quality and undergoes rigorous checks by our quality controllers to ensure export-grade standards.
Metallurgical Image Analyzer
METALLURGISTS. It has two main toolbars
1) Measurement Tools
2) Metallography Tools
1. Measurement Tools.
(A).Calibration:- This tools is for calibrating through calibration scale. This is done once while the system is integrated with Camera/Microscope/Adapter and the Software. And the Calibration remain as Standards for any future Capture and Study.
(B).Length:- This is used for measuring length .It can measure any given length found in the image with respect to any findings or portions thereof. It calculates according to your selected calibrated scale name, choosen from the list of predetermined Magnifcation.
(C).Angle:- This is used for measuring angles of three selected point of the captured image.
(D).Perimeter:- This is used for measuring perimeter of irregular shapes
(E).Width:- This is used for measuring width .It will give Minor Width, Major Width and Average Width too.
(F).Radius:- This is used for measuring three points radius.
(G).Area:- This is used for measuring area with respect to Manual selection of a portion, Square, Rectangle, Oval and Circle.
(H).Color:- This enables to select a Contrast Color for easy visualization and draw.
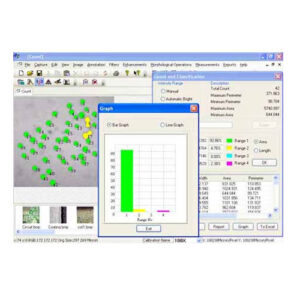
(I).Counting:- The Material Pro 3.0 enables automatic counting of particles. It has three intensity range for counting such as manual , automatic and bright objects determination method. In the process total count is derived, Max dia, Minimum Dia, Max Area, Min. Area and Its percentage etc., based on the Area Range in different color it can be identified , Each Grain Particle can be distinguished and numbered automatically, Label color can also be changed, . It is used to measure and density parameters for the image objects (particles powders, inclusions, grains, etc.)
2.Metallography Tools.
(A).Grain Size:- As per American Standard of Testing Materials(ASTM) Grain Measurement and Number can be arrived at with direct tabulation method on two methods.
1. Manual and Interception . In manual you can select with mouse. It will measure Intercept, Diameter , Grain No., Avg, Grain Area(mm).and measures to ASTM E 112 method. 2. In Interception method it is automatic. It will measure Mean Intercept, Diameter, Grain No., Avg, Grain Area in (mm), Avg. Grain Area in (mm).
(B).Phase:- ASTM E 566 1245
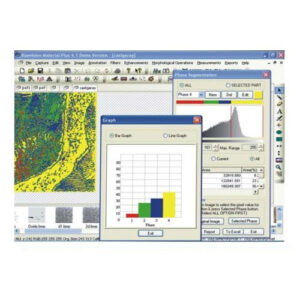
This is used to estimate the area percentage of different phases composition of material. Phase Analysis. Thresholding can be done by different colors. Number of Phases can be drawn. Preview can be seen. It will calculate Area% and Area of selected Phase in different colors. Single Phase can be done by simply clicking on particular portion and it can be reset or deleted.
It allows user to acquire, process , and analyse the images of the polished sections when it is necessary to estimate the area percentage of different phases. If the image is color or b/w (depending on the image)the program starts its processing. The phases for (e.g different minerals, inclusions in the metals, etc.) are threshold. For phase thresholding the B/W or Color manual thresholding method is used. If you are not satisfied with their thresholding there is an ability to adjust it by moving the graphical sliders.
(C).Decarbization:- ASTM E 1077
This is used for Decarbization . It has two method Manual and Automatic. In manual method you can simply mark two different portion then it will calculate the decarb level In automatic you have to simply move the slider and click on Decarb it will calculate Max, Min and Average of decarb level.
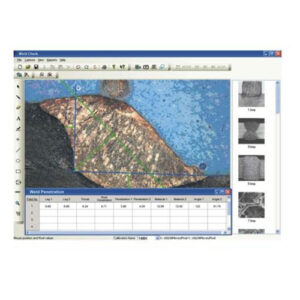
(E).Coating Thickness:- ASTM B 487
It has two options Manualy and Automatic .In manually simply mark your Area for calculating then it will calculate. In Automatic simply mark your portion with the mouse it will be appeared in rectangular shape then click on calculate.It will give results in Min Length, Max length, Average length, Min height ,Max height and Average height.
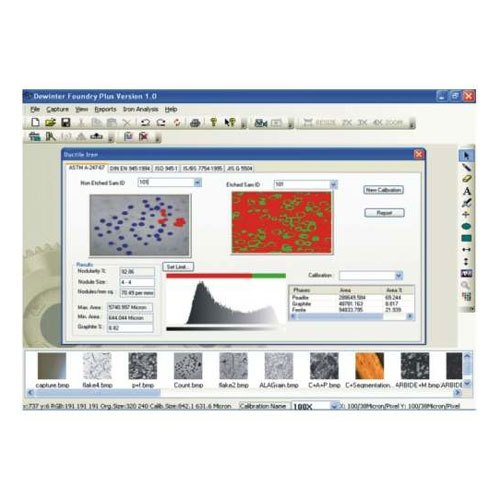
(F).Nodularity:- ASTM A 247
This is used for Nodules analysis. It has three intensity range for counting Manual by selecting area, Automatic dark objects, Automatic bright objects. It will Count in Total Count, Max Dia , Min Dia, Max Area, Min Area, Percentage. It will give results in Total Objects, Nodule count, Nodularity %, Nodules /mm sq , Max Dia , Min Dia, Max Area , Min Area.
(G).Porosity:- ASTM 276
This is used for Porosity Analysis. It has three intensity range for counting Manual by selecting area, Automatic dark objects, Automatic bright objects. It will Count in Total Count, Max Dia, Min Dia, Max Area, Min Area, Percentage. It can be Measured on selected Phase also by simple clicking on your sample images. It will give Results in Field Name, No. of count, Area %, Dia Average, Area Average.
H).Inclusion:- ASTM E 454 – E 1245
Non-Metalic Inclusion rating can be done by ASTM & DIN standards. It will give in Min, Max , Length, Width , Ap. Ratio., Type ,Severity level. It will give results for Type in A Thin, A Thick, B Thin, B Thick, C Thin, C Thick, D Thin, D Thick. For Severity level it starts from .5 , 1, 1.5, 2, 2.5 to 5.Results in %.
I).Particle Measurement
This is used for measuring particles by simple clicking on it . It has three intensity range for counting , Manual by selecting area, Automatic dark objects, Automatic bright objects. Labels in numbers ,Color of label can be changed. It will give results in Sr. No.,Length, Width , Area and Ap. Ratio.
(J).Density
This is used for measuring density in Black & White images. It will give results in %.It can be done by simply dragging the mouse on the image as rectangular shape.
(K).Filters
It has various filter for improving image quality. It has Solarize, Emboss, Bright, Sharpness, Smooth, Diffuse, and Contrast. It can be done simply moving slider.
(L).Invert
Image can be changed in Invert and can be saved with new name.
(M).Annotation
It has various options like you can write text on image, We can mark with arrow, We can mark with pointer, We can draw square and rectangle on image. We can change Line color, text color, Font color ,size, Font name, Bold, Italic ,Underline. These all can be saved with new file name. It can be refresh if you have made any mistake.
(N).Back Ground Removal
It is used for removing background color, that is used in Phase Analysis. It is used when an image is not cleared.
(O).Amalgamation
This is for merging two images.

Reviews
There are no reviews yet.